How to create your Layer-by-Layer LEGO® Build Plan from your Minecraft Creation
You might have seen quite a few standard LEGO® Minecraft® sets. However, none of these creations are as unique as your own designs. In this short tutorial we show you how to generate a layer-by-layer build plan for YOUR Minecraft creations using your standard LEGO bricks with just a few clicks. Even for Aquatic.
What do you need?
You need
- A Windows/Mac/Unix Computer with the Minecraft world containing your creation(s)
- An internet connection
For the impatient
Jump to craftplicator to start converting your Minecraft World into LEGO bricks right away.
Or watch the 3 min. how-to-video that describes the Minecraft in Lego bricks converting process.
Locate your Minecraft World on your machine
Minecraft stores all worlds in a standard folder. By default it “hides” the folders containing world and user settings.
On Windows
|
Default world folder location
|
C:\Users\<user_name>\AppData\Roaming\.minecraft\saves
If you don’t find it, “unhide” it
1. Open your File Explorer 2. Go to C:\Users\<user_name>\ 3. Select View from the Menu 4. Go to Folder Options 5. Select the View Tab 6. Select Show Hidden Files |
On Mac
|
Default world folder location
|
/Users/<user_name>/Library/Application Support/minecraft/saves
If you don’t find it, “unhide” it
1. Open Finder 2. Go To /Users/<user_name> 3. Hit: CMD + SHIFT + . |
On Unix (Desktop)
|
Default world folder location
|
/home/<user_name>/.minecraft/saves
If you don’t find it, “unhide” it
1. Open File Manager 2. Go to /home/<user_name> 3. Hit: CTRL + H |
On Raspberry PI (and Servers)
|
Default world folder location
|
/home/pi/minecraft/world
Accessing the folder over the network Using SAMBA provides an easy way to access the folder on the server. Setting up other Linux systems is very similar and should be completed in 5-10 minutes depending on your Linux skills. Once you can access the SAMBA folder, Craftplicator will use it like any other local drive.Here is the shortened version for setup of the Raspberry Pi: sudo apt-get install samba samba-common-bin sudo nano /etc/samba/smb.conf Add the following lines to smb.conf. Please keep in mind the 0777 settings gives everyone read and write access to your minecraft world folder. If you have security concerns you can change the settings accordingly. [minecraft_world] Comment = Pi shared folder Path = /home/pi/minecraft/world Browseable = yes Writeable = Yes only guest = no create mask = 0777 directory mask = 0777 Public = yes Guest ok = yes force user = pi Restart the service with: sudo /etc/init.d/samba restart |
Converting your Minecraft World into a build plan for your LEGO bricks
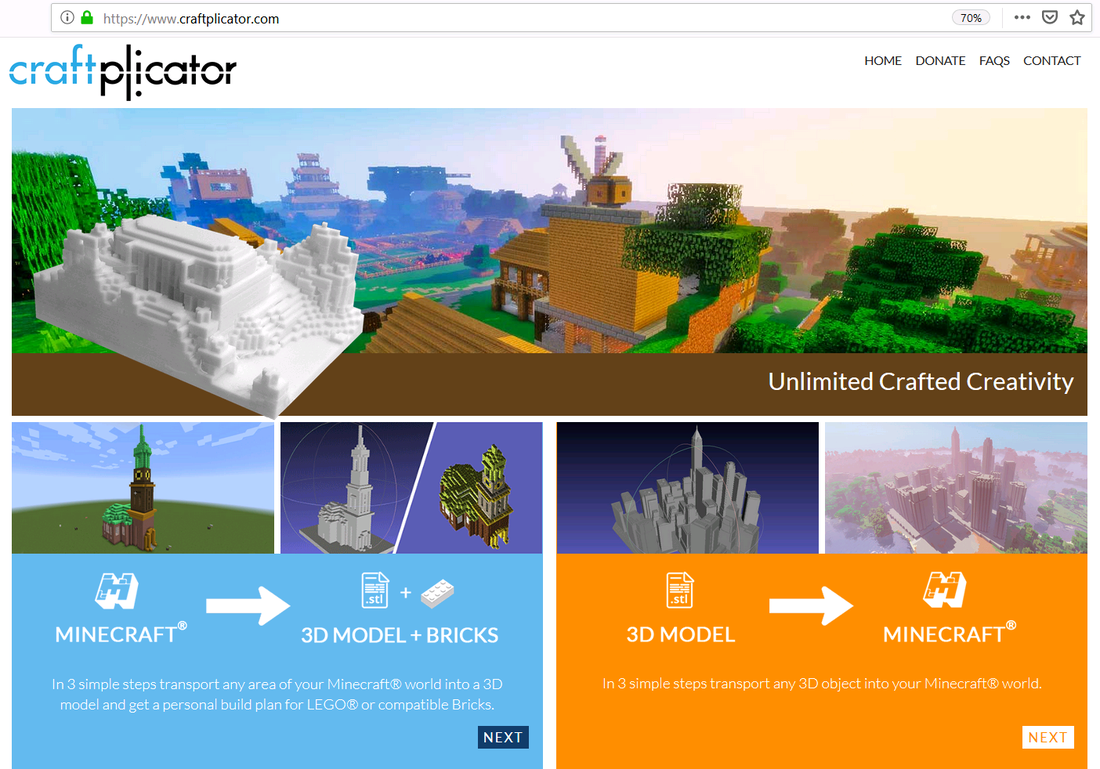
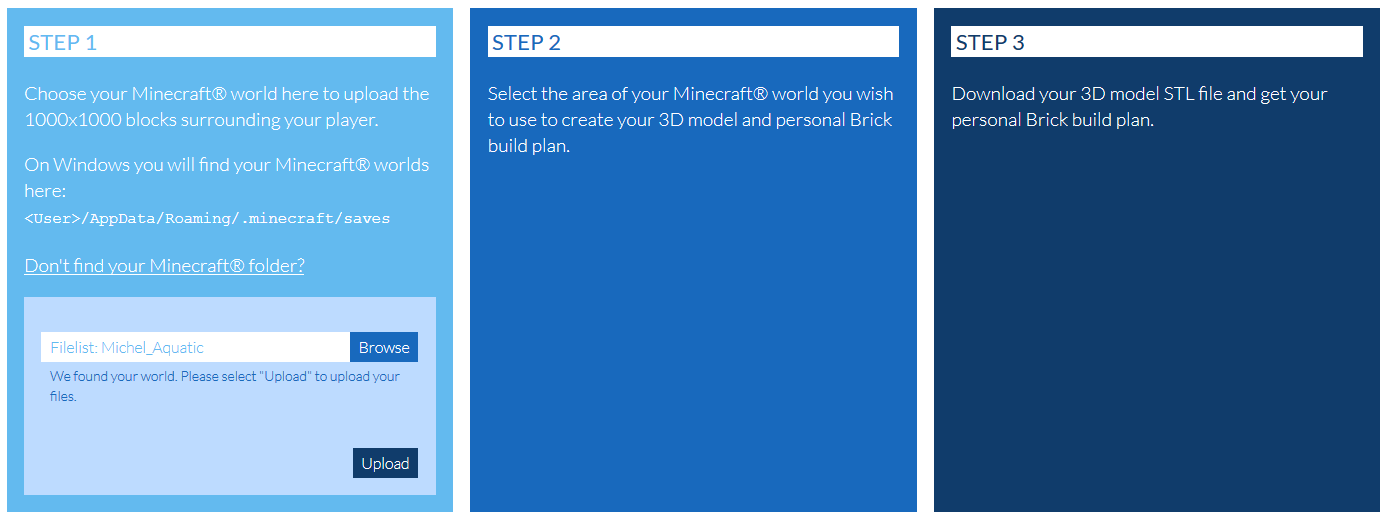
Open your browser and go to www.craftplicator.com .
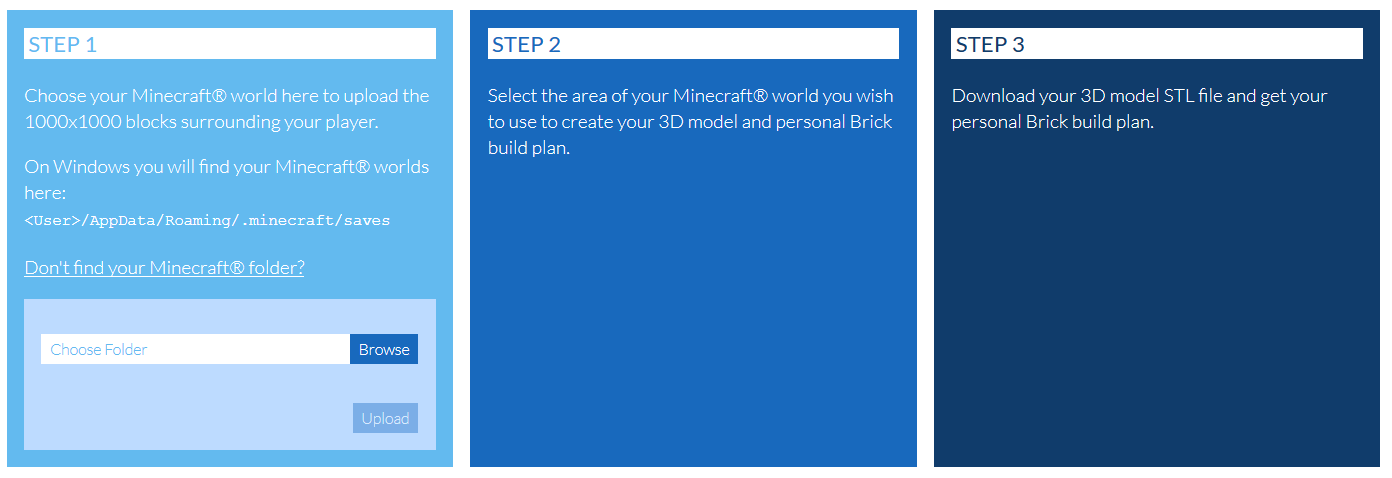
Select the Next button on the left side of the screen.
Select the Next button on the left side of the screen.
|
Select your Minecraft world by clicking the Browse button and picking the Minecraft world you have previously located.
|
|
And click the Upload Button
|
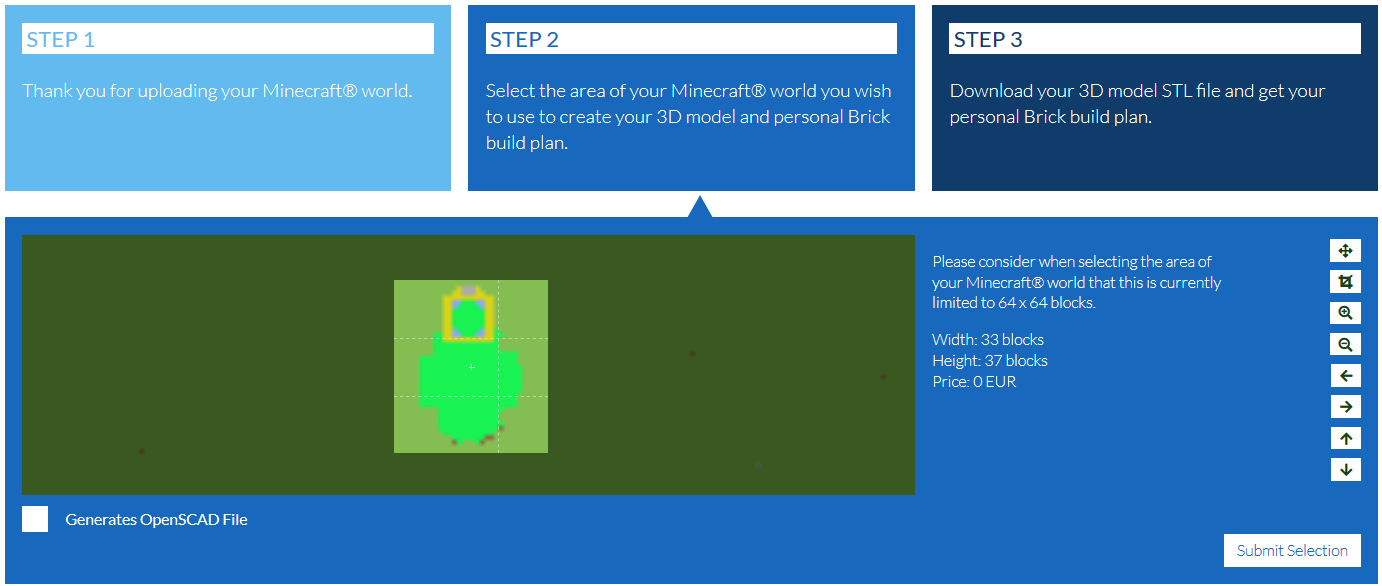
After a few seconds or minutes (depending on the size of your Minecraft world) you can select the Minecraft area you would like to convert into your layer-by-layer build plan for your LEGOs.
Please keep in mind that your selection area is not too large, as things might get REALLY expensive to build and the computing power / time needed for your plan increases by the power of 3. After all the most common larger LEGO plates are 48x48. Sometimes 64x64.
Then hit the Submit Selection button.
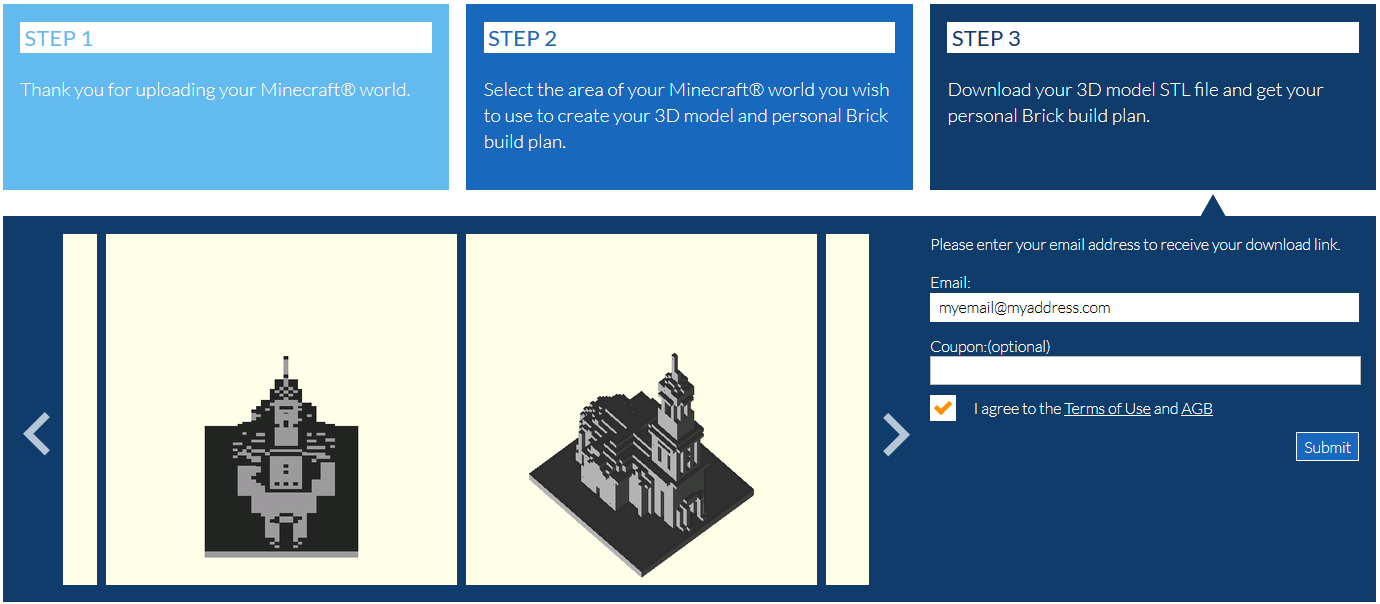
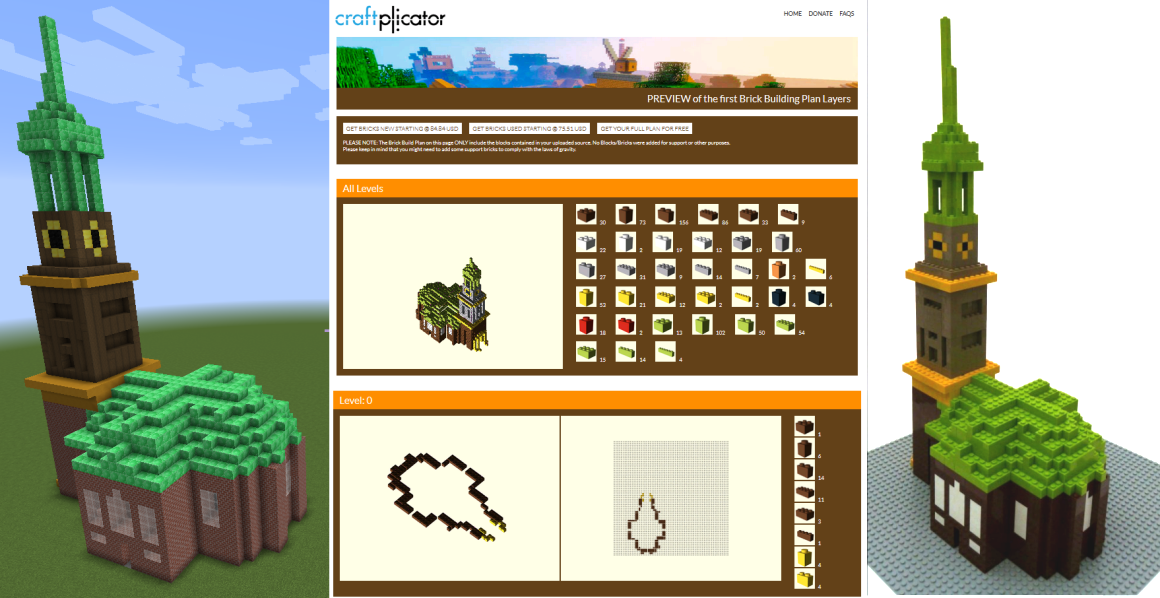
Then enter your eMail address to receive an email containing a 3D STL file (for 3D printing on your 3D printer should you have access to one) AND a link to your layer-by-layer build plan. It will look similar to the image shown below.
Depending on the selection size the email usually shows up in 3 to 30 minutes and starts with a 3D STL file download button for all the guys wanting to 3D print their Minecraft creation.
The button to pick for the LEGO fans, who want to build their Minecraft creation in LEGO bricks, is at the bottom right and is named Download Brick Layers.
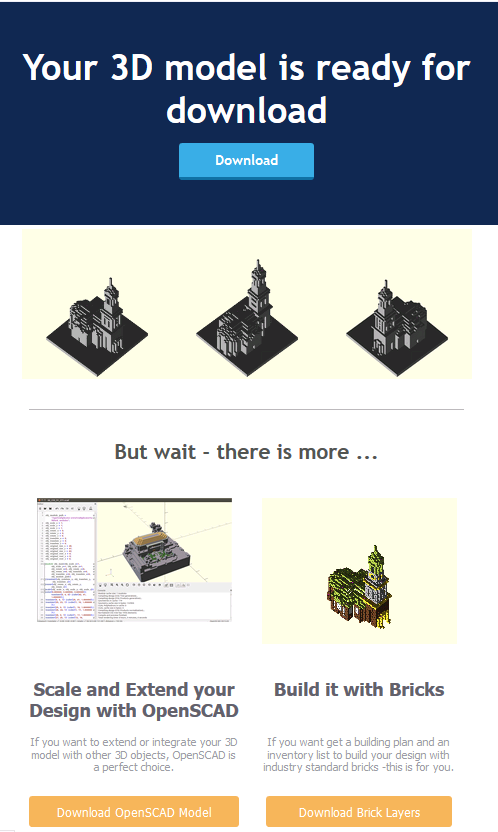
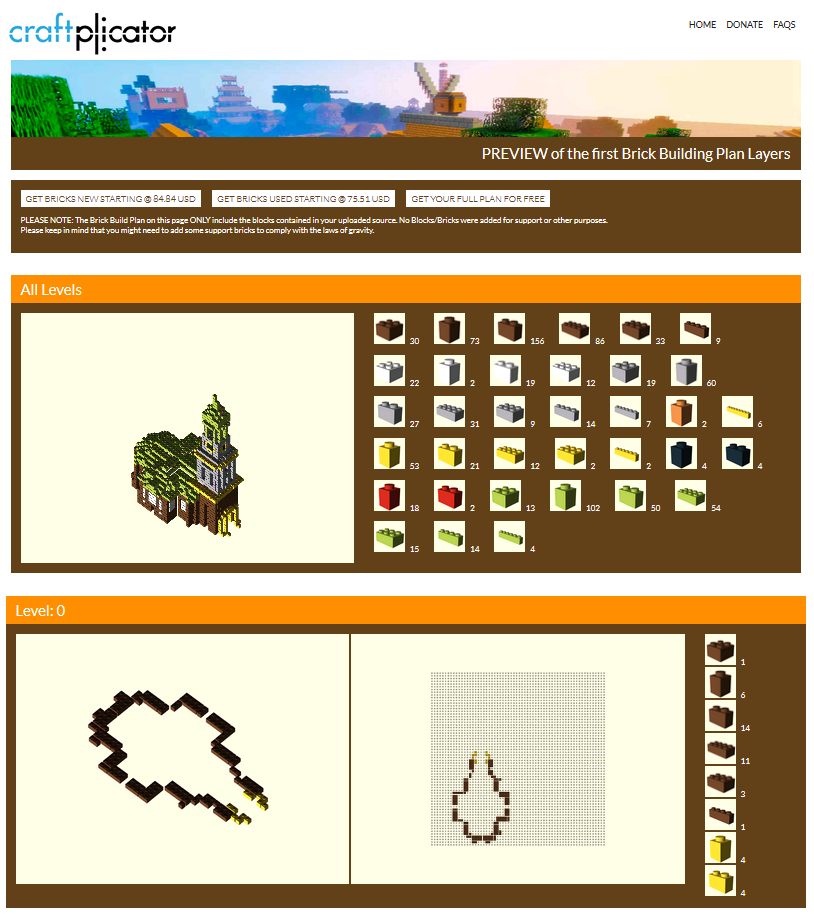
Once clicked, it takes you to a page containing a 4 layer preview of your LEGO layer-by-layer brick build plan. If you selected a model small enough to qualify for free delivery, you can select the GET YOUR FULL PLAN FOR FREE button at the top of the page to get to the full build plan for all layers.
If you happen to own all LEGO bricks you need, you are all set for your individual LEGO Minecraft MOC adventure.
For all of you that are missing a few or all of the required LEGOs, the system has generated a (completely optional) Brick Owl shopping basket for convenience.
Brick Owl provides a worldwide marketplace service to allow customers to connect with stores selling LEGO and LEGO related items. These stores independently market, sell and support these items.
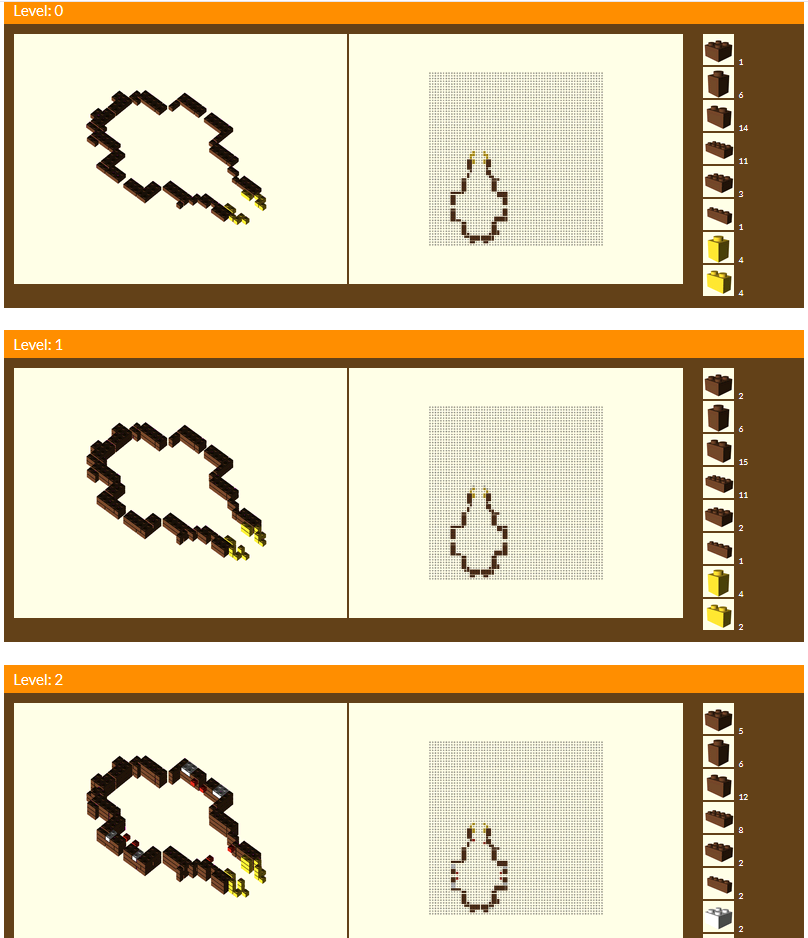
Every layer shows two sides. The left view shows your progress and the right top-down shows you where to put the bricks. Stud-by-stud. The previous layer is shown a reference with dimmed gray bricks.
For all of you that are missing a few or all of the required LEGOs, the system has generated a (completely optional) Brick Owl shopping basket for convenience.
Brick Owl provides a worldwide marketplace service to allow customers to connect with stores selling LEGO and LEGO related items. These stores independently market, sell and support these items.
Every layer shows two sides. The left view shows your progress and the right top-down shows you where to put the bricks. Stud-by-stud. The previous layer is shown a reference with dimmed gray bricks.
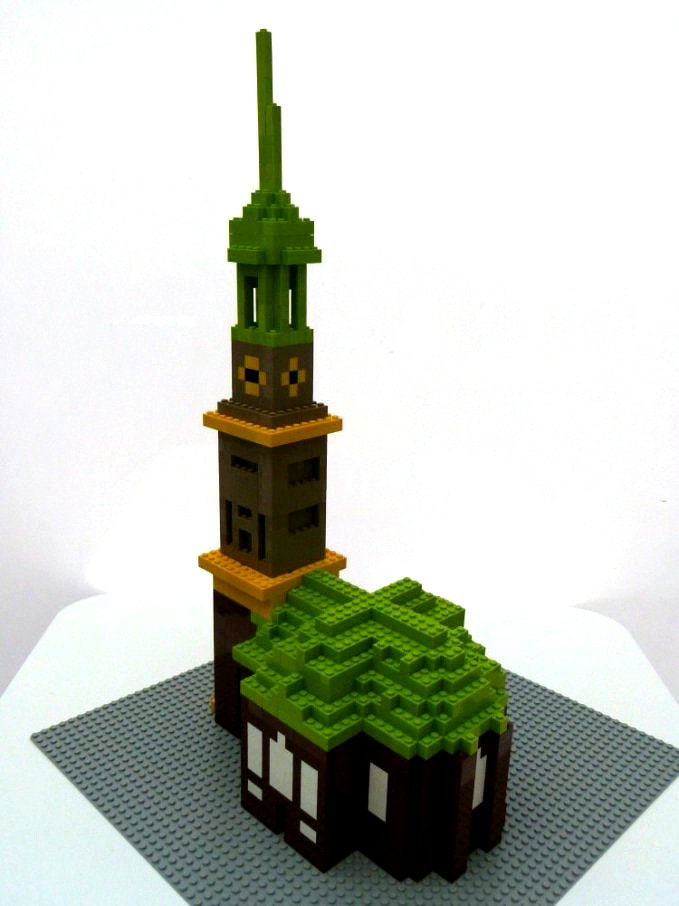
And when you are done you might ending up with something like this: